https://www.sip2connect.com/
Add Trunk
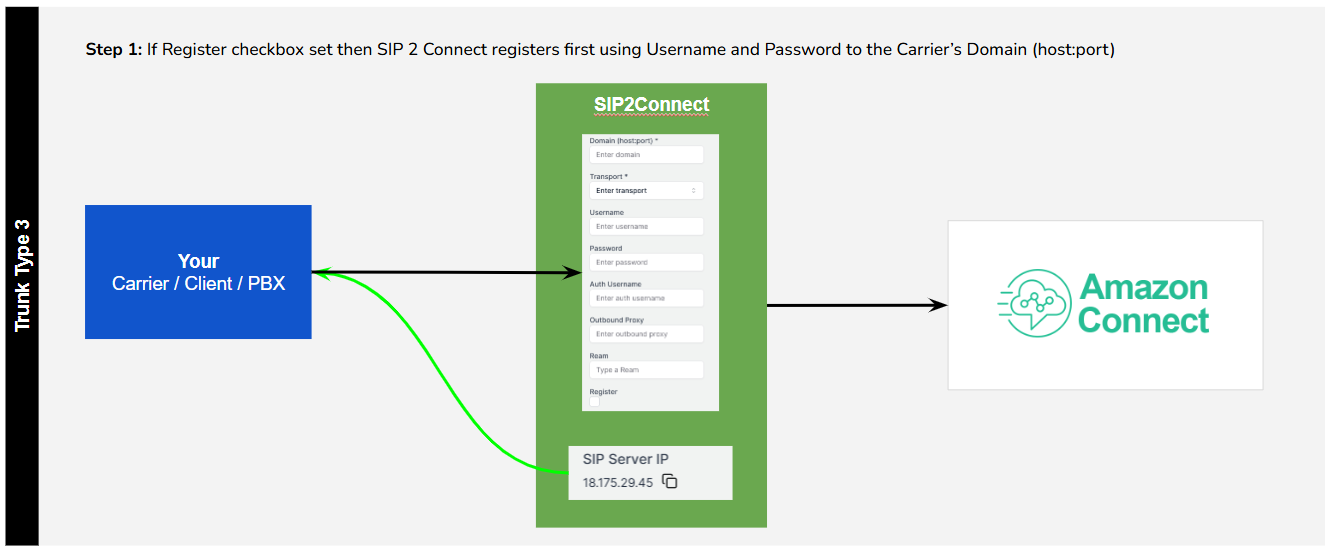
You can add different types of trunks in SIP2Connect. This help page explains how to add a new trunk using the [T3] “SIP2Connect register to carrier as an extension” type trunk.
Architecture
Trunk config panel
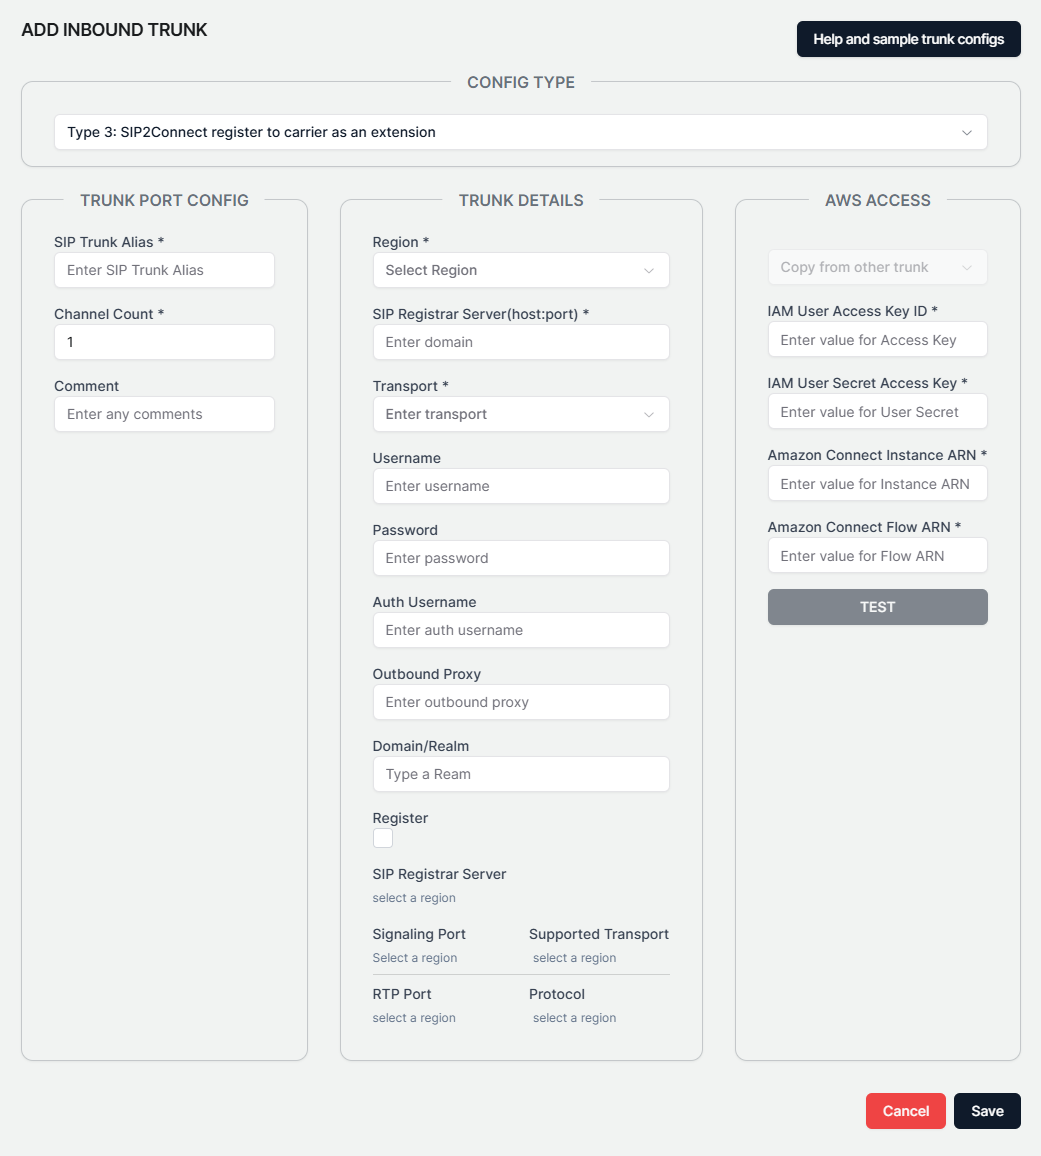
Trunk Port Config
SIP Trunk Alias
This is a mandatory field. A user-friendly name assigned to the trunk to make it more readable and understandable.
Channel Count
This is a mandatory numeric field. Set and limit the maximum call count allowed on this trunk.
Comment
Add notes or extra information to the trunk
Trunk Details
Region
This is a mandatory field. Select the location of the SIP 2 Conenct server. It is recommended to choose the closest region.
Registrar Server
These are mandatory fields. Provide your registrar server IP and SIP signaling port where the SIP 2 Conenct server should send registration requests, SIP messages, and invites.
SIP Registar Server
IP address of the SIP 2 Connect server. Auto generated. Configure on your provider or endpoint side and send registration request, SIP messages, and invites to this IP address using the port and protocol generated under Signaling Port and Supported Transport.
Transport
Select your preferred SIP signaling transport protocol.
Username, Password and Auth Username
Optional fields. Provide Username and Password that should be used by the SIP 2 Conenct server to register to your SIP server.
Outbound Proxy and Domain/Realm
Optional fields. Provide Outbound Proxy and Domain/Realm that should be used by the SIP 2 Conenct server to register to your SIP server.
AWS Access
This section collects the configured AWS user and Amazon Conenct details where the calls will land.
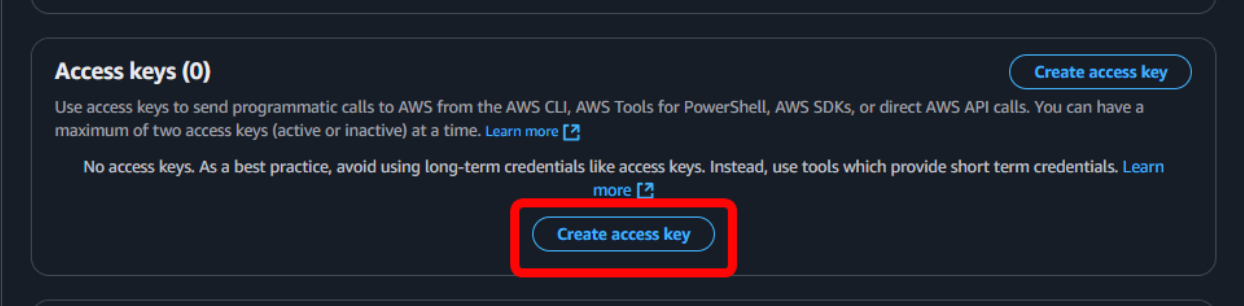
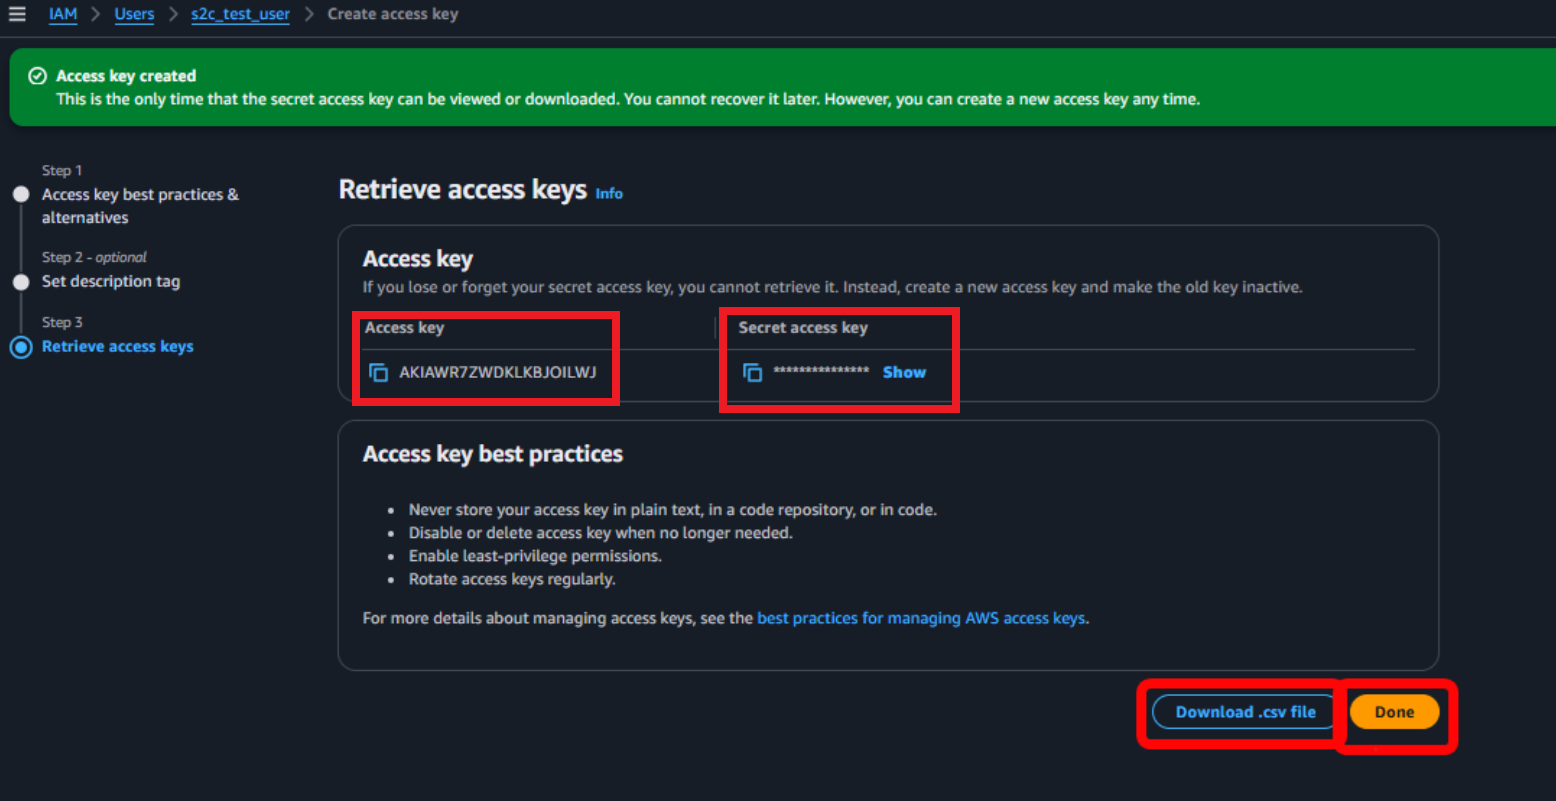
IAM User Access Key Id
This is a mandatory field. The configured AWS IAM user’s Access Key Id. For configuration steps and more details, see the AWS IAM user configuration section below.
IAM User Secret Access Key
This is a mandatory field. The configured AWS IAM user’s Secret Access Key. For configuration steps and more details, see the AWS IAM user configuration section below.
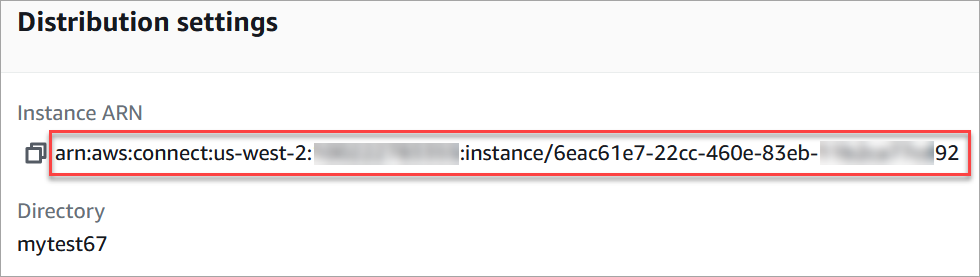
Amazon Connect Instance ARN
This is a mandatory field. The ARN of the Amazon Connect handles the call. For more details, see the Amazon Connect details section below.
Amazon Connect Flow ARN
This is a mandatory field. The flow ARN is the flow you want to use for inbound calls. You can either reuse an existing flow that you’re already using for voice or create a new one specifically for SIP 2 Conect calls. For more details, see the Amazon Connect details section below.
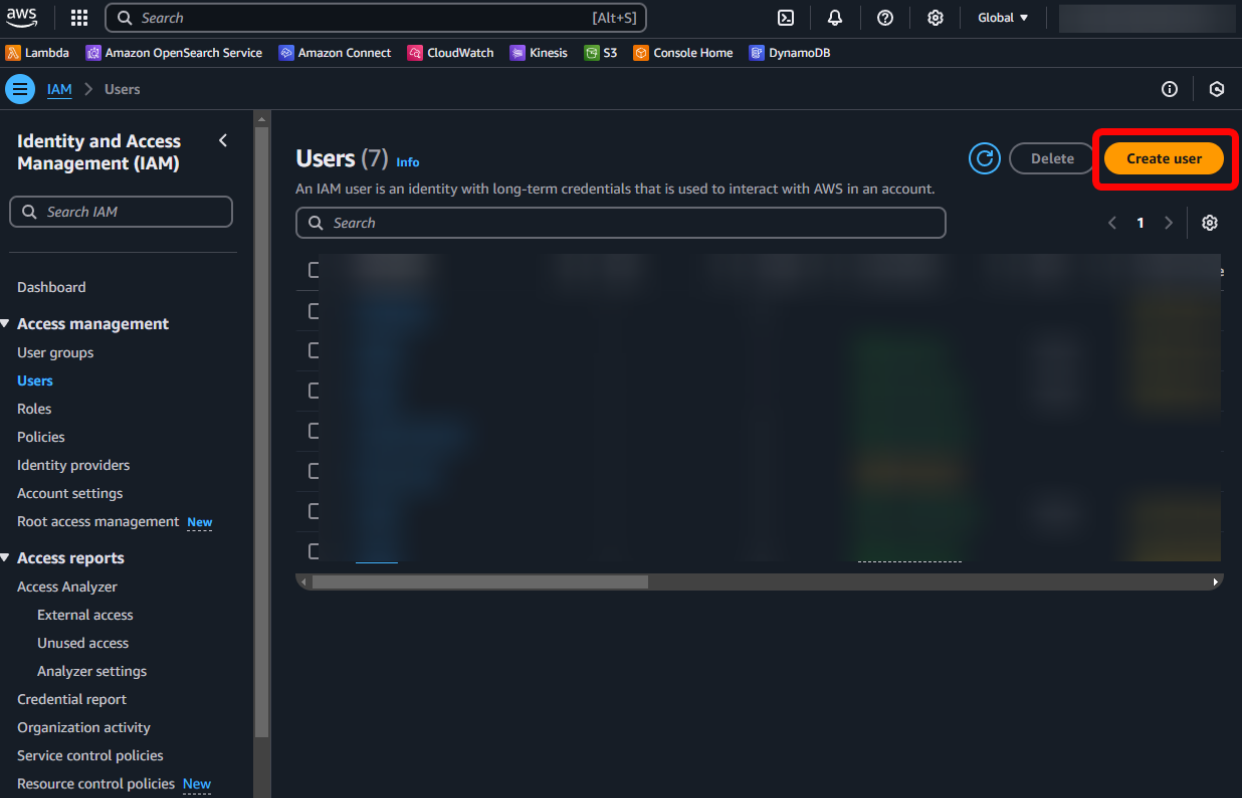
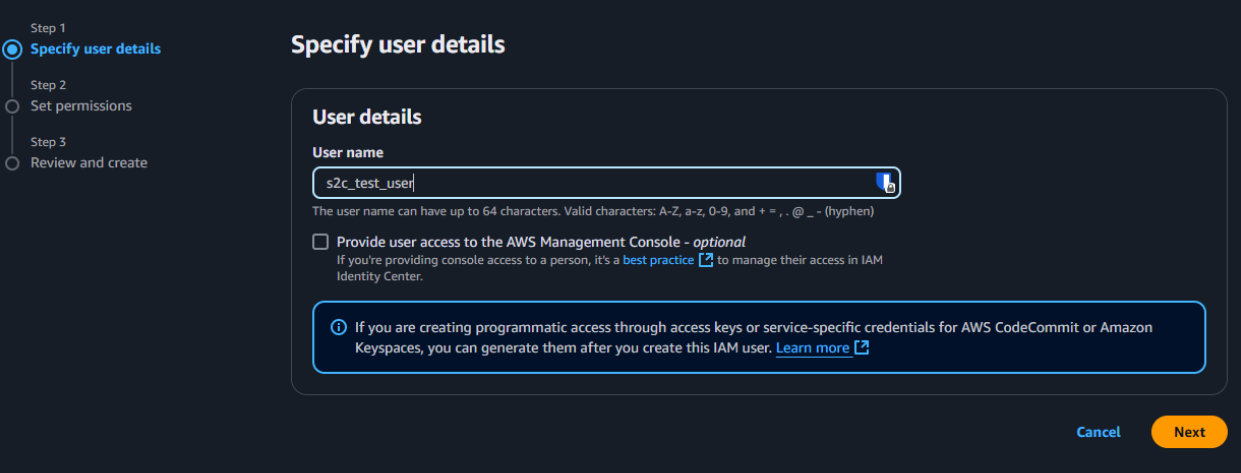
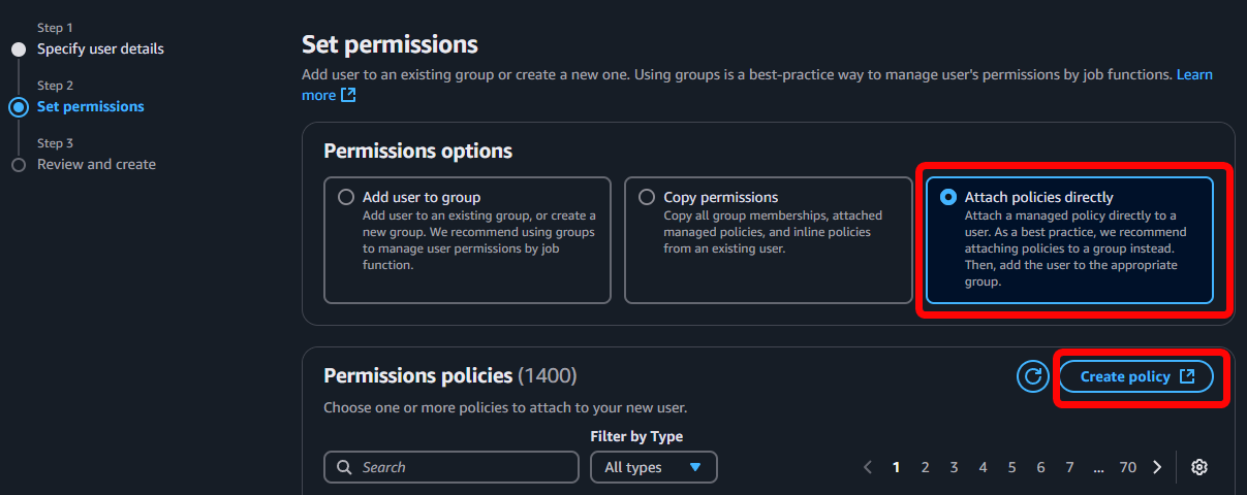
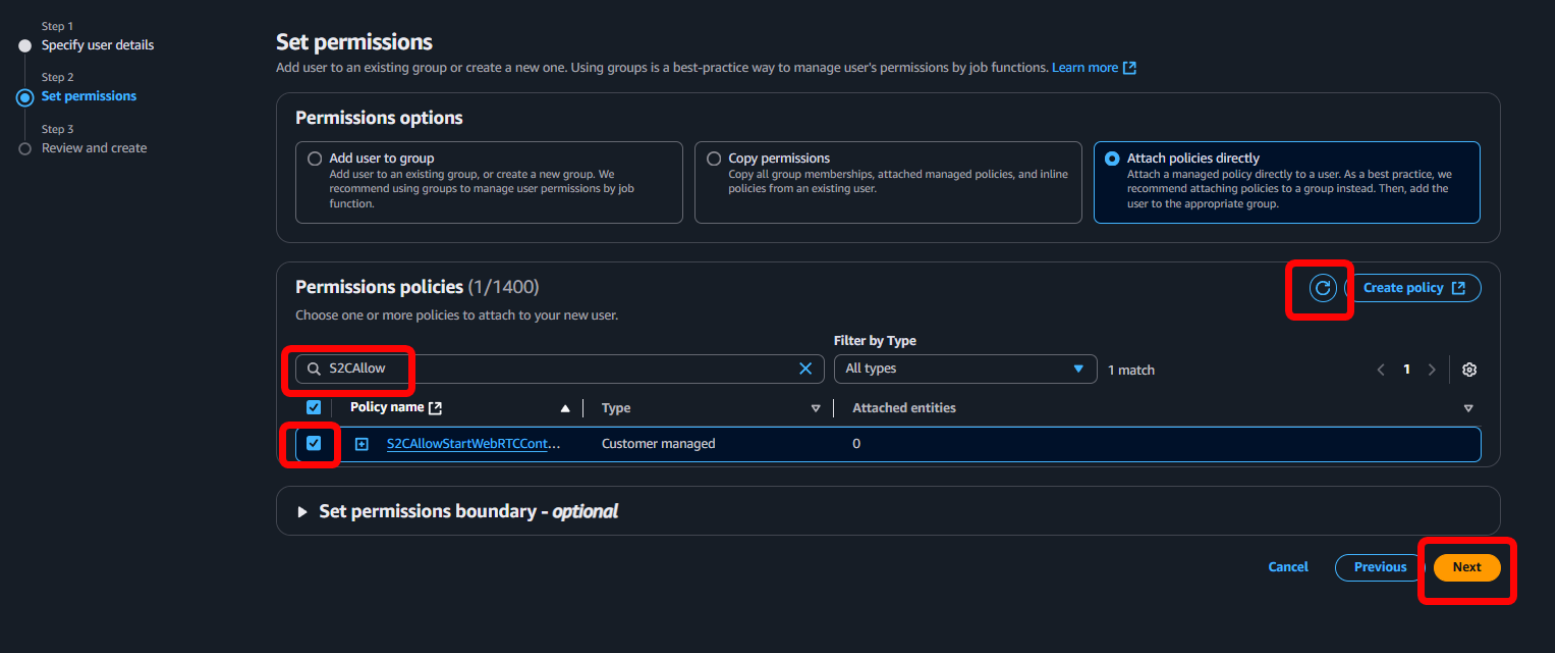
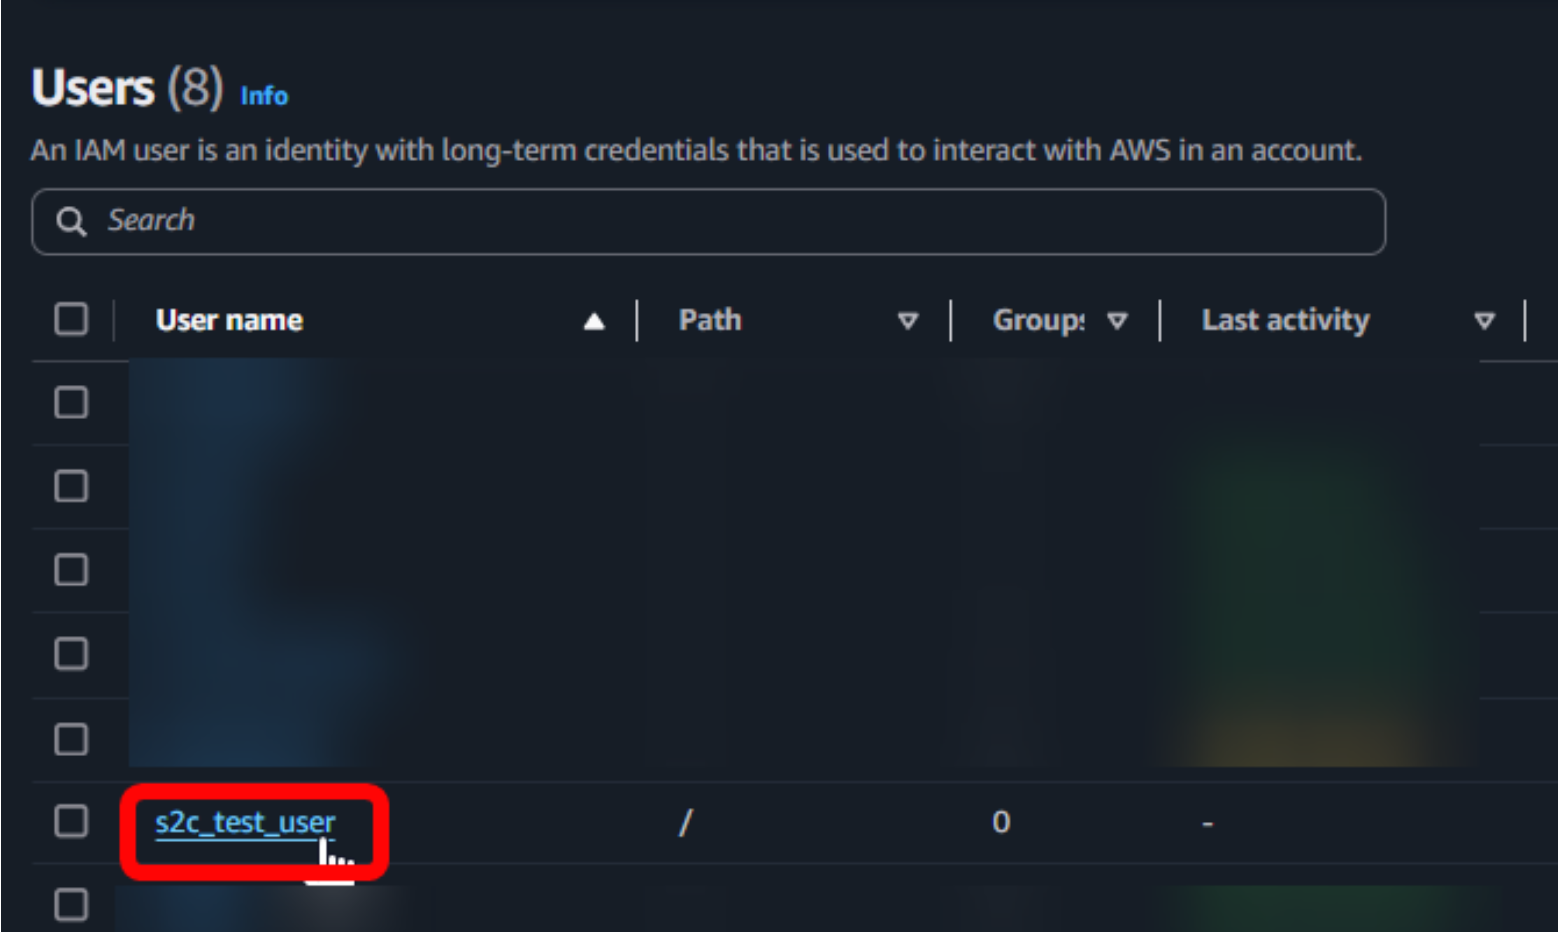
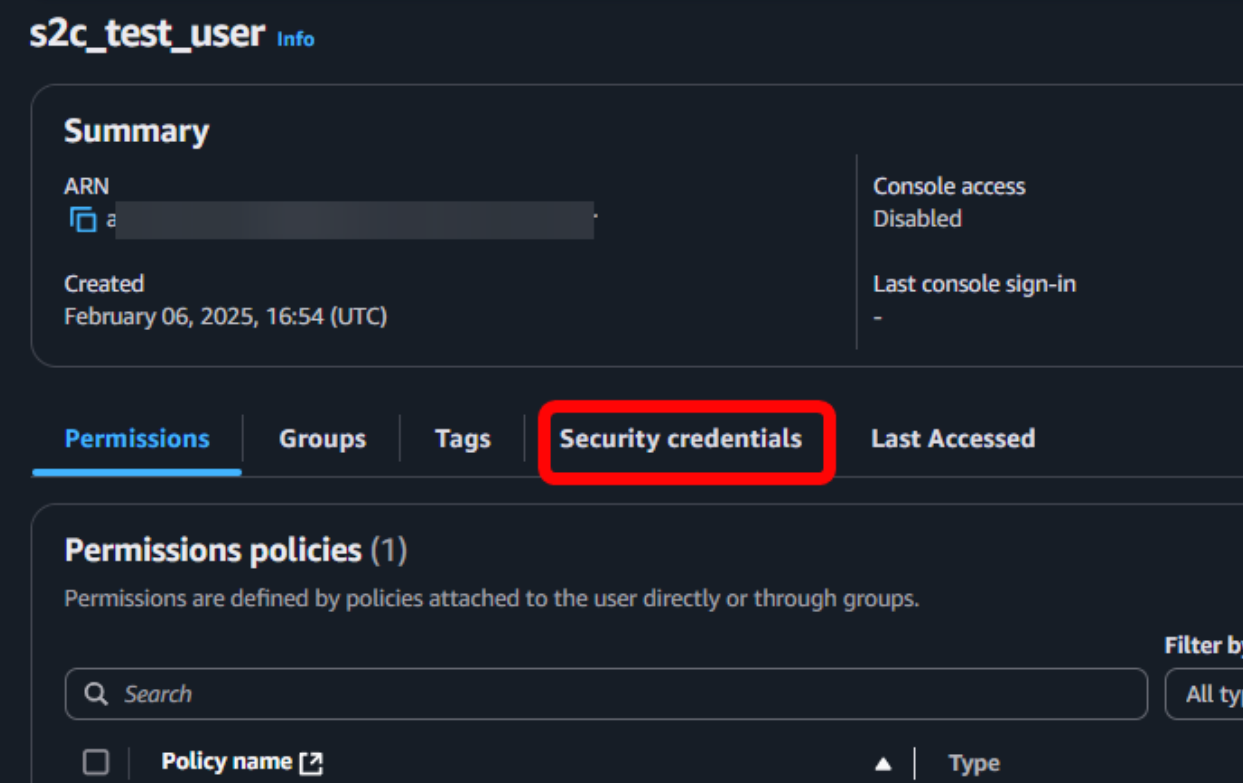
AWS IAM user configuration
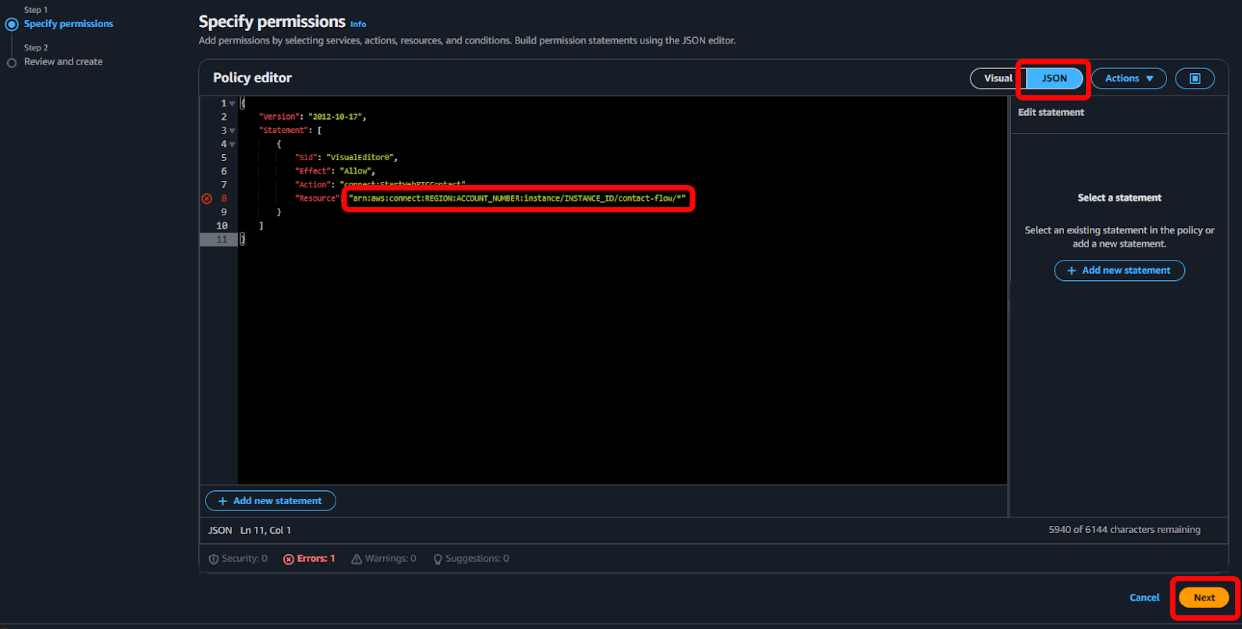
{“Version”: “2012-10-17”, “Statement”: [ { “Sid”: “VisualEditor0”, “Effect”: “Allow”, “Action”: “connect:StartWebRTCContact”, “Resource”: “arn:aws:connect:REGION:ACCOUNT_NUMBER:instance/INSTANCE_ID/contact-flow/*” } ] } |

Amazon Connect detials
Open the Amazon Connect console at https://console.aws.amazon.com/connect/
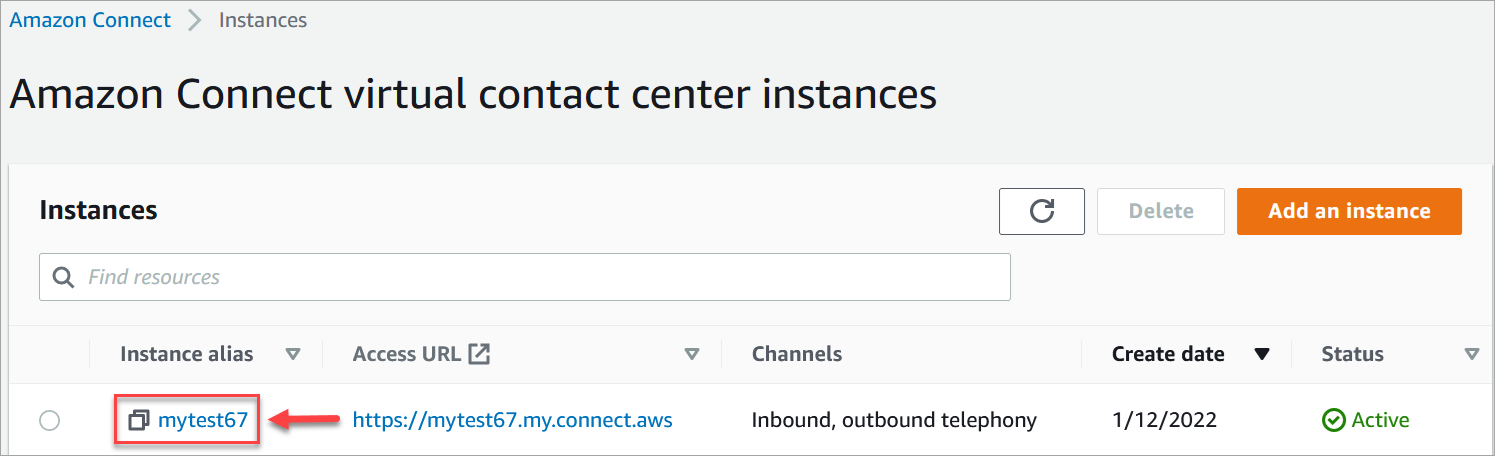
On the instances page, choose the instance alias. The instance alias is also your instance name, which appears in your Amazon Connect URL. The following image shows the Amazon Connect virtual contact center instances page, with a box around the instance alias.
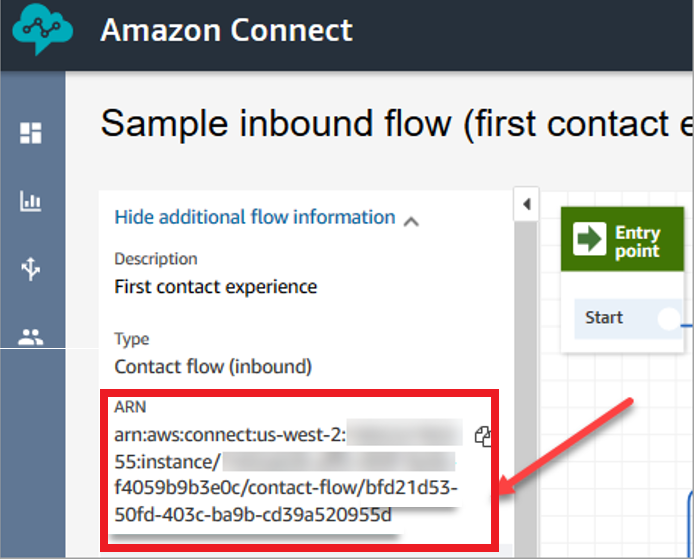
Amazon Connect Instance ARN
Amazon Connect Flow ARN
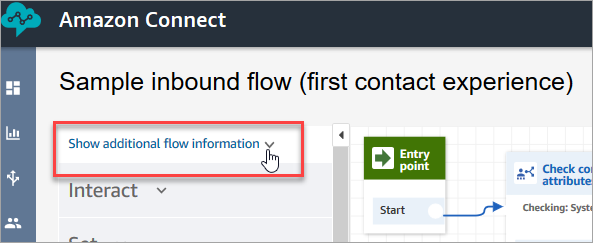
Log in to the Amazon Connect console. On the navigation menu, choose Routing, Contact flows. Select the flow you want to use. Only choose flows that are type Flow (inbound).
In the flow designer, expand Show additional flow information.